
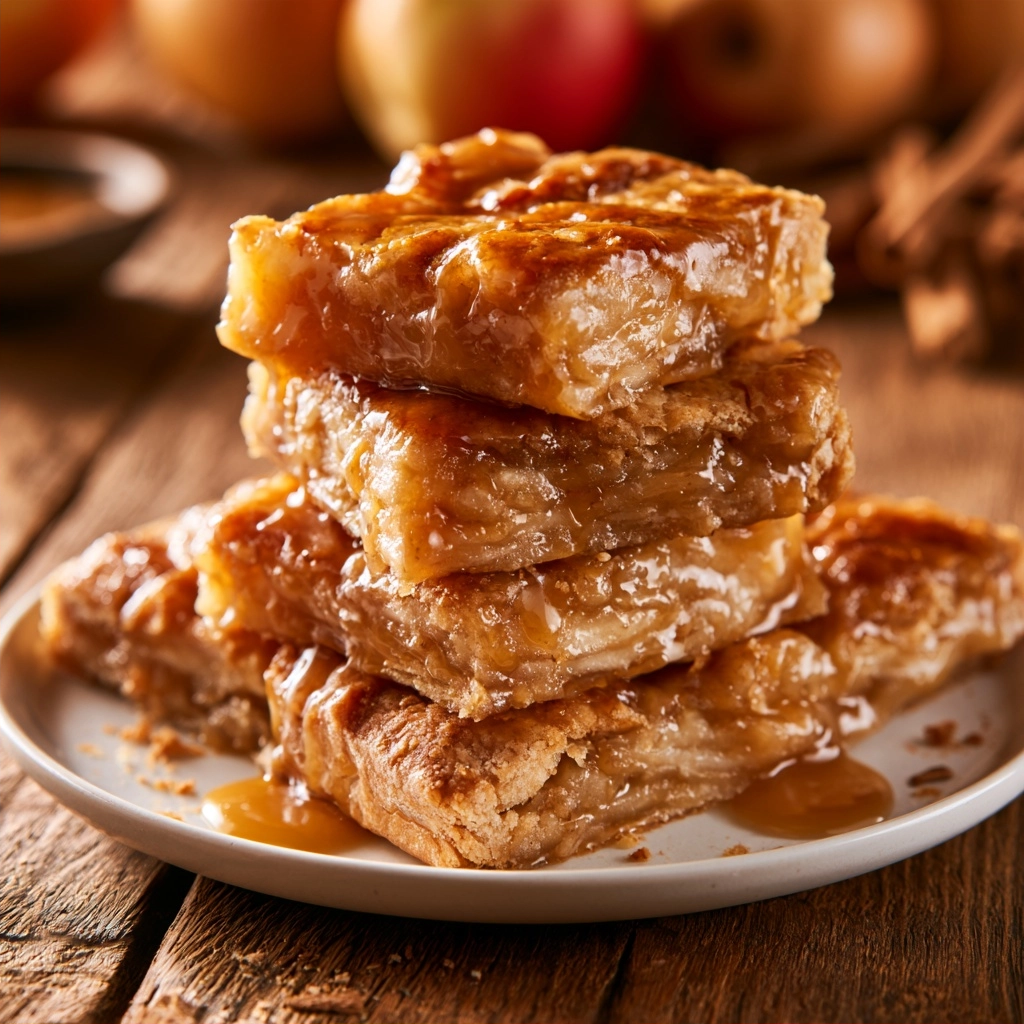
Apple pie bars offer a convenient way to enjoy the classic flavors of a homemade orchard dessert in a portable, sturdy format. These bars combine a buttery oat crust with a spiced fruit filling to create the ultimate treat for any season. At Eminent Recipes, I developed this method to ensure you get a crisp base without the fuss of rolling out traditional dough. You will love this recipe because it is quick, easy, and entirely family-friendly.
Why This Recipe Works
This recipe succeeds because it utilizes a dual-purpose crumble mixture that functions as both the base and the topping. By pre-baking the bottom layer, I ensure the crust remains firm and prevents the juicy apple filling from creating a soggy mess. This simple technique saves time compared to standard pies while maintaining that desired flaky texture in every bite.
My experience in the kitchen has shown that using a blend of apple varieties, specifically Granny Smith mixed with Honeycrisp, provides the perfect balance of tartness and structure. The addition of rolled oats adds a hearty, rustic mouthfeel that pairs perfectly with the fragrant cinnamon and nutmeg. These bars represent a comfortable, customizable dish that adapts easily to busy weeknights or elaborate holiday gatherings.
Ingredients
| Ingredient | Quantity | Notes |
|---|---|---|
| All-purpose flour | 300 g | Substitute with pastry flour for a softer texture. |
| Old-fashioned rolled oats | 150 g | Avoid instant oats as they turn mushy. |
| Light brown sugar | 200 g | Dark brown sugar works for a deeper molasses flavor. |
| Fine salt | 3 g | Essential for balancing the sweetness. |
| Ground cinnamon | 9 g total | Divided between crust and filling. |
| Unsalted butter | 340 g | Must be very cold for a crumbly texture. |
| Apples | 1000 g | Use a mix of firm, tart varieties. |
| Granulated sugar | 100 g | Adjust based on apple sweetness. |
| Cornstarch | 15 g | Crucial for thickening the fruit juices. |
| Nutmeg | 1 g | Freshly grated provides the best aroma. |
| Lemon juice | 30 ml | Prevents oxidation and adds brightness. |
| Vanilla extract | 7.5 ml total | Adds depth to both fruit and glaze. |
Step-by-Step Instructions
Preparation
- Preheat your oven to 175°C (350°F).
- Line a 23 x 33 cm baking pan with parchment paper, leaving an overhang on the long sides for easy removal.
Crust and Crumble
- Whisk the flour, oats, brown sugar, salt, and 4 g of cinnamon in a large mixing bowl.
- Add the cold, cubed butter and rub it into the dry ingredients with your fingertips until the mixture resembles coarse, clumpy crumbs.
- Reserve 300 g of the crumble mixture for the topping.
- Press the remaining mixture firmly and evenly into the prepared baking pan using the bottom of a measuring cup.
- Bake the base for 15 minutes until the edges turn lightly golden.
Filling and Baking
- Toss the diced apples with granulated sugar, cornstarch, 5 g cinnamon, nutmeg, lemon juice, and 5 ml vanilla in a bowl until the apples are well coated.
- Spread the apple mixture evenly over the pre-baked, warm crust.
- Scatter the reserved crumble topping over the apple layer and press down very lightly so it adheres without compacting the fruit.
- Bake for 35 to 40 minutes until the topping reaches a deep golden brown and the fruit filling bubbles at the edges.
- Cool the bars completely in the pan for at least two hours to allow the filling to set properly before slicing.
- Whisk the glaze ingredients until smooth and drizzle over the bars before cutting into 24 squares.
Chef Tips for Perfect Results
- Keep the butter ice-cold to ensure the crust stays crumbly and light rather than greasy.
- Slice the apples into uniform 1 cm pieces so they cook evenly within the 40-minute window.
- Tent the pan with aluminum foil if the topping browns too quickly before the filling has fully bubbled.
- Always allow the bars to cool to room temperature or chill before slicing to achieve clean, professional edges.
Common Mistakes to Avoid
- Using instant oats results in a gummy texture; always stick to old-fashioned rolled oats for the best bite.
- Skipping the pre-baking step of the crust often leads to a soggy bottom that falls apart when served.
- Cutting the bars while they are still warm will cause the filling to spill out because the cornstarch needs to cool to gel effectively.
- Overcrowding the pan with too many apple slices can lead to excess liquid; stick to the recommended weight for the perfect ratio.
Variations and Substitutions
| Ingredient | Substitution | Impact |
|---|---|---|
| Brown sugar | Coconut sugar | Adds a subtle caramel note. |
| Apples | Pears | Softer, sweeter, more floral profile. |
| All-purpose flour | Gluten-free flour blend | Requires xanthan gum for stability. |
Serving Suggestions and Pairings
Serve these bars at room temperature for a casual afternoon tea or warm them slightly to pair with a scoop of vanilla bean ice cream for a decadent dessert. They make an excellent addition to autumn potlucks or harvest parties when served alongside hot apple cider or a robust coffee blend.
Storage and Reheating
| Method | Duration | Instructions |
|---|---|---|
| Countertop | 2 days | Store in an airtight container. |
| Refrigerator | 4 days | Keep covered to maintain texture. |
| Freezer | 3 months | Wrap individually and thaw at room temperature. |
Nutritional Information
| Nutrient | Amount per Serving (Approximate values) |
|---|---|
| Calories | 210 kcal |
| Protein | 2 g |
| Fat | 9 g |
| Carbohydrates | 32 g |
| Fiber | 2 g |
| Sugar | 18 g |
| Sodium | 45 mg |
Frequently Asked Questions
Can I substitute the apples with other fruits?
Yes, you can substitute firm pears or even peaches for the apples. Ensure that softer fruits are tossed with an extra teaspoon of cornstarch to manage the higher moisture content.
How do I know when the bars are finished baking?
The bars are finished when the topping is a deep golden brown and the fruit mixture is visibly bubbling at the edges. If the edges are bubbling but the top is pale, continue baking for another five minutes.
Why did my bars fall apart when I cut them?
The bars fall apart because they were likely sliced while still warm, preventing the cornstarch-thickened filling from setting. Wait at least two hours for the filling to cool and stabilize before removing the bars from the parchment paper.
Can I assemble these bars ahead of time?
You can prepare the crumble and store it in the fridge up to 24 hours before baking. For the best texture, toss the apples with the spices and sugar just before assembling to prevent the fruit from releasing too much juice early.
How can I make these bars more portable?
To make these bars easier to carry for picnics, omit the glaze or store it in a separate container to drizzle just before serving. Wrapping each bar individually in parchment paper helps keep the crust intact during transit.
Conclusion
Mastering these apple pie bars provides a reliable dessert option that captures the essence of home baking without excessive effort. By following the tips regarding crust temperature and cooling time, you will consistently achieve perfect, sliceable results. These bars offer a comforting balance of textures that everyone at your table will enjoy. Whether you serve them at a holiday gathering or a simple weekend brunch, their signature warm cinnamon flavor never disappoints.