
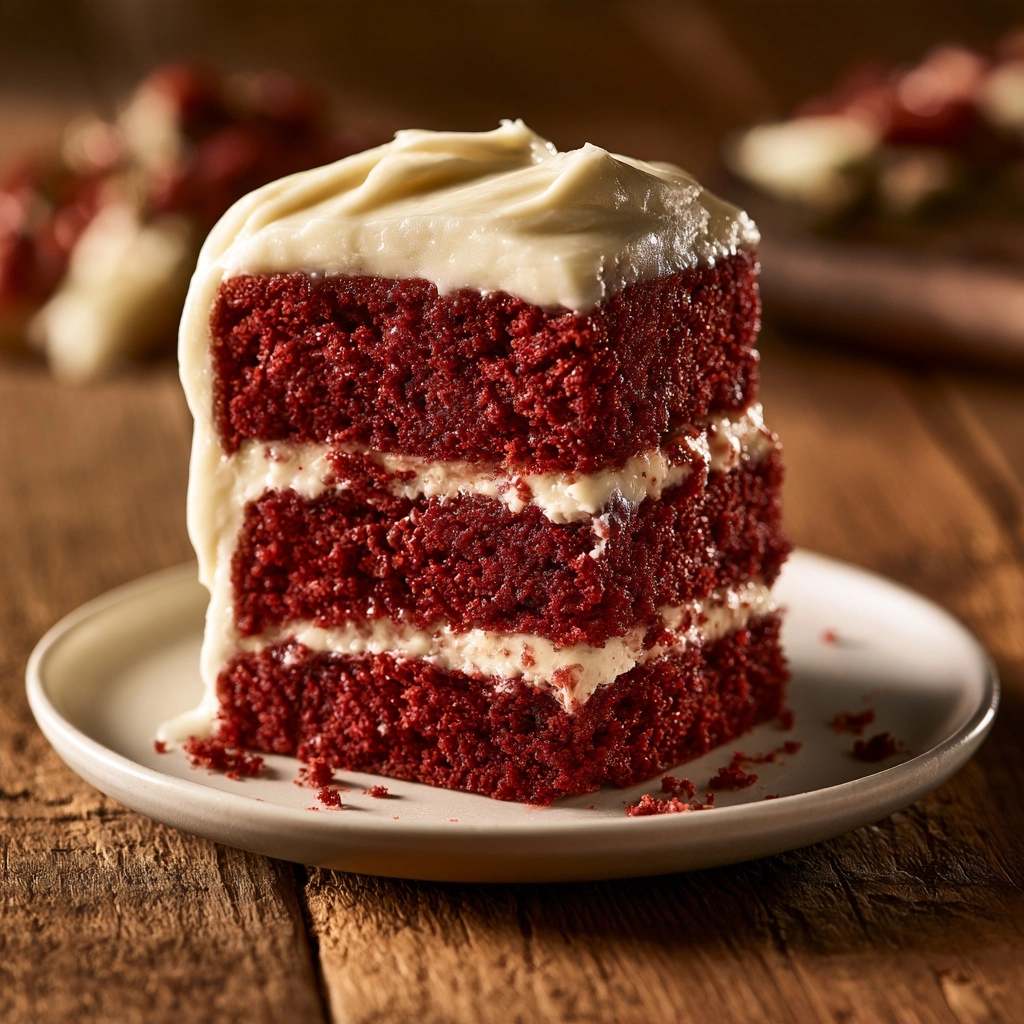
Classic Red Velvet Cake remains a sophisticated staple for celebrations, featuring a distinct velvet-like crumb and tangy notes. At Eminent Recipes, I have refined this recipe to ensure every home baker achieves that perfect, moist, and vibrant red result without any complicated steps. You will love how this quick, easy, and family-friendly dessert creates a professional-looking centerpiece that satisfies both beginner bakers and seasoned dessert enthusiasts alike.
| Prep Time | Cook Time | Total Time | Servings | Difficulty | Cuisine |
|---|---|---|---|---|---|
| 30 min | 30 min | 60 min | 12 | Intermediate | American |
Why This Recipe Works
This specific formula prioritizes a tender crumb by utilizing high-quality ingredients and precise mixing techniques. I spent years testing various ratios to ensure the balance between the natural cocoa powder and the acidity of the buttermilk creates that signature, delicate tang that defines a true red velvet cake.
You will appreciate that this recipe is highly reliable and yields a consistent result every time you step into the kitchen. By creating a paste with the cocoa, food coloring, and a portion of the buttermilk, we guarantee a deep, uniform color throughout the cake layers without relying on excessive liquid dye.
Ingredients
| Ingredient | Quantity | Notes |
|---|---|---|
| All-purpose flour | 300 g | Spoon and level carefully |
| Baking soda | 5 g | Fresh is essential for lift |
| Fine salt | 5 g | Balances sweetness |
| Natural cocoa powder | 15 g | Do not use Dutch-processed |
| Red gel food coloring | 15 g | Provides superior color intensity |
| Buttermilk | 240 ml | Room temperature is vital |
| White vinegar | 15 ml | Activates the baking soda |
| Unsalted butter | 226 g | Softened to room temperature |
| Granulated sugar | 300 g | Fine grain works best |
| Large eggs | 3 | Room temperature |
| Vanilla extract | 10 ml | Pure extract recommended |
| Cream cheese | 450 g | Full-fat, softened |
| Powdered sugar | 480 g | Sifted for smoothness |
Step-by-Step Instructions
Preparation and Dry Mix
- Preheat your oven to 175°C (350°F) and place a rack in the middle position.
- Grease two 23 cm round pans and line the bottoms with parchment paper for easy removal.
- Whisk the flour, baking soda, and salt together in a medium bowl until thoroughly combined.
Creating the Base
- Combine the cocoa, red gel coloring, and 30 ml of buttermilk in a small bowl to create a smooth, deep red paste.
- Stir the white vinegar into the remaining 210 ml of buttermilk in a separate container.
- Beat the butter and sugar in a large bowl on medium speed for 4 minutes until the mixture looks pale and fluffy.
- Add the eggs one at a time, followed by the vanilla, ensuring each is fully incorporated before adding the next.
Mixing and Baking
- Beat the red paste into the butter mixture for 1 minute until completely streak-free.
- Add the flour mixture in 3 additions and the buttermilk mixture in 2, alternating and finishing with flour on low speed.
- Divide the batter equally between the prepared pans and bake for 28 to 32 minutes until a toothpick comes out clean.
- Cool the cakes in the pans for 10 minutes before transferring to a wire rack to cool completely.
Frosting and Assembly
- Beat the cream cheese and butter for 2 minutes, then add vanilla, salt, and powdered sugar, beating until fluffy.
- Trim the domes off the cooled cake layers and rub the trimmings through a sieve to create fine red crumbs.
- Spread one-third of the frosting on the bottom layer, stack the second layer, and coat the exterior with the remaining frosting.
- Press the reserved crumbs around the base or top and chill the cake for 30 minutes to set before slicing.
Chef Tips for Perfect Results
- Use room temperature ingredients to ensure the emulsion creates a smooth, airy batter.
- Always use gel food coloring rather than liquid to achieve an intense hue without adding excess water to the batter.
- Ensure the cake layers are completely cold before frosting to prevent the cream cheese from melting and slipping.
- Sift your powdered sugar before making the frosting to avoid lumps that are difficult to smooth out.
Common Mistakes to Avoid
Over-mixing the batter can lead to a dense, tough cake instead of the desired velvet texture. Mix only until the flour streaks disappear. Using cold butter or eggs will prevent the emulsion from forming correctly, resulting in a curdled look. Always ensure your oven is fully preheated before placing the pans inside, as the chemical reaction between the vinegar and baking soda begins immediately.
Variations and Substitutions
| Ingredient | Substitution | Impact |
|---|---|---|
| Buttermilk | Milk with lemon juice | Similar acidity |
| White vinegar | Apple cider vinegar | Slightly fruitier note |
| Cream cheese | Mascarpone | Richer, less tangy |
Frequently Asked Questions
Can I make this cake in advance?
Yes, you can bake the layers a day ahead and wrap them tightly in plastic wrap once cooled. Frost the cake on the day you plan to serve it for the best consistency.
Why did my cake sink in the middle?
A sinking cake usually results from opening the oven door too early or not fully incorporating the leavening agents. Keep the door closed until the final 5 minutes of baking.
Can I replace the food coloring?
While you can use natural beet juice, it will significantly alter the flavor profile and result in a lighter, more muted red tone. Gel food coloring is the standard for the classic aesthetic.
How do I know when the cake is done?
The cake is finished when the tops spring back when lightly touched and a toothpick inserted into the center emerges clean. Do not rely solely on the timer, as ovens vary in temperature.
What is the secret to a smooth frosting?
Beat the cream cheese and butter until perfectly smooth before adding any sugar to avoid lumps. Adding the powdered sugar slowly on low speed ensures a silky, stable finish.
Conclusion
This classic red velvet cake recipe offers a reliable way to create a bakery-quality dessert in your own kitchen. By following the steps for the red paste and proper room temperature ingredients, you guarantee a moist, tender result. Whether you are baking for a birthday or a weekend treat, this recipe provides that perfect tangy balance that makes red velvet so legendary. Happy baking!
Classic Red Velvet Cake
Ingredients
Method
- Prep the pans. Place a rack in the middle and preheat to 175°C (350°F). Grease two 23 cm (9-inch) round pans and line the bottoms with parchment.
- Mix the dry ingredients. Whisk the flour, baking soda, and salt.
- Make the color paste. In a small bowl, stir the cocoa, food coloring, and 30 ml of the buttermilk into a smooth, deep red paste. Stir the vinegar into the remaining 210 ml buttermilk.
- Cream. Beat the butter and sugar on medium speed 4 minutes, until very pale and fluffy. Beat in the eggs one at a time, then the vanilla.
- Add the color. Beat in the red paste for 1 minute, until the color is even with no streaks.
- Alternate. On low speed, add the flour mixture in 3 additions and the buttermilk-vinegar mixture in 2, starting and ending with flour. Mix just until combined.
- Bake. Divide equally between the pans (about 640 g each). Bake 28 to 32 minutes, until the tops spring back and a toothpick comes out clean.
- Cool. Cool 10 minutes in the pans, then turn out onto a rack and cool completely, about 1 hour. Warm layers melt the frosting.
- Make the frosting. Beat the cream cheese and butter on medium speed 2 minutes, until smooth with no lumps. Add the vanilla and salt. On low speed, add the powdered sugar, then beat on high 1 minute, until fluffy. If it is soft, chill 15 minutes.
- Level the layers. Trim any domed tops with a serrated knife. Rub the trimmed pieces through a sieve for fine red crumbs.
- Assemble. Spread about one-third of the frosting on the first layer, add the second layer, then frost the top and sides with the rest.
- Decorate and set. Press the crumbs around the base or on top. Chill 30 minutes for clean slices.
Notes
- Color: Use gel coloring. Liquid coloring needs about 30 ml and thins the batter.
- Cocoa: The small amount of natural cocoa gives the classic faint chocolate note. Do not use Dutch-process cocoa, which reduces the red color.
- Make ahead: Bake the layers up to 2 days ahead, wrapped at room temperature, or freeze up to 3 months.
- Storage: Keeps 4 days in the fridge. Bring to room temperature 30 minutes before serving.