
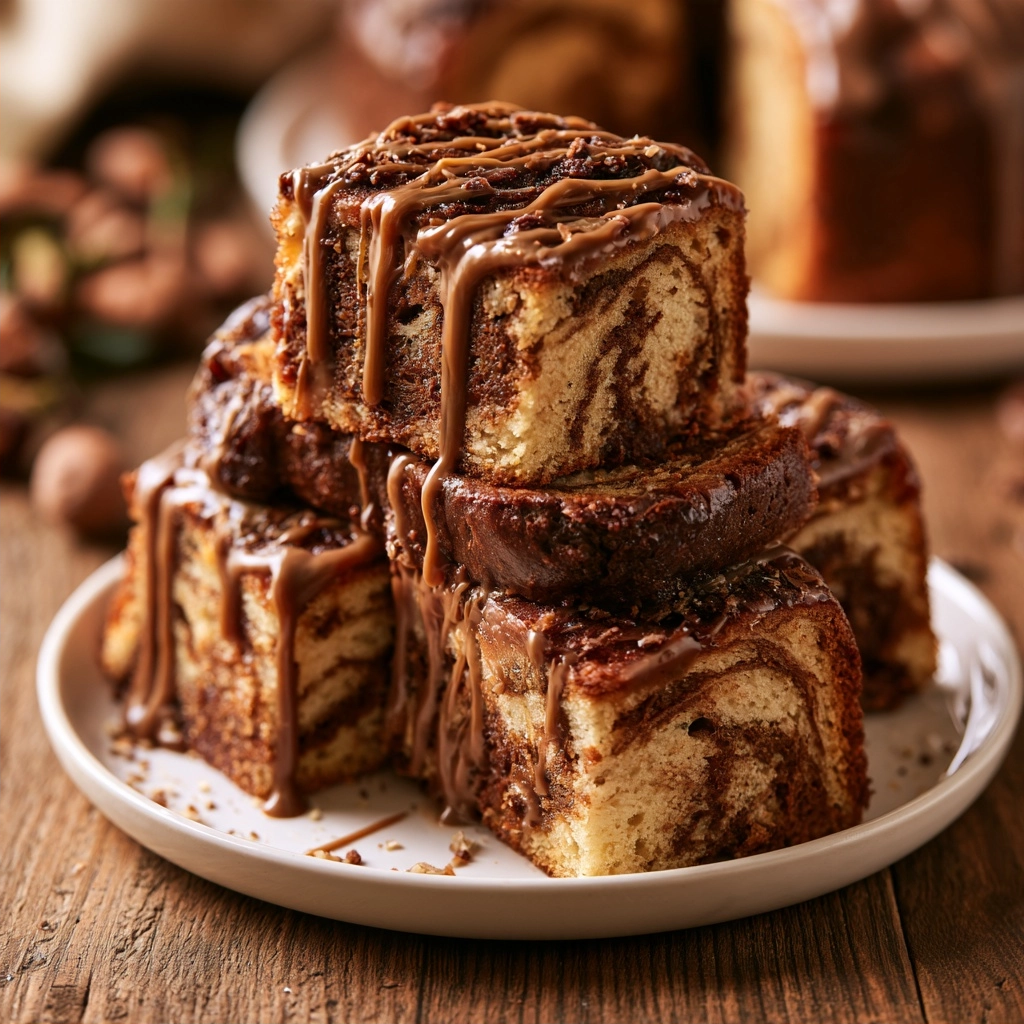
Holiday Marble Cake is a moist, tender sponge featuring elegant swirls of vanilla and rich chocolate batter baked to perfection. At Eminent Recipes, I developed this version to bridge the gap between simple home baking and bakery-quality visual appeal. This cake provides a reliable, crowd-pleasing dessert that serves as an excellent centerpiece for seasonal gatherings or weekend afternoons. The balanced texture makes it a staple for anyone seeking a sophisticated yet accessible treat.
Recipe Overview
| Prep Time | Cook Time | Total Time | Servings | Difficulty | Cuisine |
|---|---|---|---|---|---|
| 20 minutes | 50 minutes | 1 hour 10 minutes | 10-12 | Easy | American |
Why This Recipe Works
This recipe works because it relies on the creaming method to create a light, stable structure that holds the marble pattern without sinking. By alternating the milk and flour, the batter achieves a velvety crumb that remains moist for days. My experience with this cake shows that temperature control is the primary factor in achieving success; using room temperature eggs and milk ensures a perfect emulsion every time.
You will love this recipe for its versatility and ease of preparation. It is quick, straightforward, and creates a result that looks far more complex than it actually is. Whether you are hosting a busy holiday dinner or simply want a comfortable, customizable cake for your family, this one-pot approach saves time while delivering consistent, high-quality results.
Ingredients
| Ingredient | Quantity | Notes |
|---|---|---|
| All-purpose flour | 280 g | Sift for best results |
| Granulated sugar | 230 g | Divide as needed |
| Baking powder | 10 g | Ensure freshness |
| Fine salt | 3 g | Enhances chocolate notes |
| Unsalted butter | 170 g | Softened to room temp |
| Large eggs | 3 | Room temperature |
| Whole milk | 180 ml | Room temperature |
| Vanilla extract | 10 ml | Pure extract preferred |
| Cocoa powder | 35 g | Unsweetened quality cocoa |
| Hot water | 45 ml | For blooming cocoa |
Step-by-Step Instructions
Preparation
- Preheat your oven to 175°C (350°F) and grease a 23 cm (9-inch) Bundt pan thoroughly, dusting it lightly with flour to prevent sticking.
- Whisk the flour, baking powder, and salt together in a medium bowl until evenly distributed.
- Beat the softened butter with 230 g of granulated sugar in a large mixing bowl for 4-5 minutes until the mixture looks pale and fluffy.
- Incorporate the eggs one at a time, followed by the vanilla extract, ensuring each egg is fully emulsified before adding the next.
- Add the flour mixture to the butter base in three additions, alternating with the milk, and mix until just combined to avoid overworking the gluten.
Creating the Marble Pattern
- Whisk the cocoa powder with 45 ml of hot water and 15 g of extra sugar in a small bowl until it forms a smooth paste.
- Stir approximately one-third of the prepared vanilla batter into the cocoa mixture to create your chocolate base.
- Spoon alternating portions of vanilla and chocolate batter into the prepared Bundt pan.
- Run a butter knife through the batter in gentle curves to create the marble effect, being careful not to over-mix and muddy the colors.
- Bake for 40-50 minutes until a skewer inserted into the center comes out clean or with a few moist crumbs.
- Rest the cake in the pan for 15 minutes before inverting onto a wire rack to cool completely.
- Whisk the powdered sugar with enough milk to form a thick drizzle and apply over the cooled cake, adding optional food coloring if desired.
Chef Tips for Perfect Results
- Always use room temperature ingredients to prevent the batter from curdling during the creaming process.
- Do not over-mix once the flour is added; fold until just combined to ensure a soft, delicate crumb.
- Use a metal skewer to test the center, as the dark color of the chocolate batter can make visual cues difficult.
- Bloom your cocoa powder in hot water to intensify the chocolate flavor profile before folding it into the batter.
- Ensure the Bundt pan is greased in every crevice; if you lack confidence, use a baking spray containing flour for complete coverage.
Common Mistakes to Avoid
- Over-mixing the batter: This creates a tough, rubbery cake instead of a tender one; stop as soon as streaks of flour disappear.
- Using cold eggs: Cold ingredients will cause the butter to solidify, leading to a dense and uneven cake texture.
- Excessive swirling: If you stir too much when marbleizing, you will blend the two colors into one light brown shade instead of distinct swirls.
- Opening the oven door: Opening the door too early causes the cake to collapse; keep it closed for the first 35 minutes of baking.
Variations and Substitutions
| Ingredient | Substitution | Impact |
|---|---|---|
| Whole Milk | Almond Milk | Lighter, nuttier finish |
| Granulated Sugar | Coconut Sugar | Adds caramel undertones |
| Vanilla Extract | Almond Extract | Distinct floral aroma |
Frequently Asked Questions
Can I make this cake ahead of time?
You can bake this cake up to two days in advance if stored in an airtight container at room temperature. The crumb often becomes more moist and flavorful after sitting for twenty-four hours.
How do I know when the cake is fully cooked?
The cake is done when a wooden skewer or cake tester inserted into the thickest part of the ring comes out clean. If you see wet batter, add three minutes to your timer and test again.
Why did my marble design disappear?
The design likely faded because you over-mixed the batter or added the two colors too fluidly. Keep the dollops of batter distinct and use a light touch with the knife to preserve the pattern.
What if I do not have a Bundt pan?
You can use a standard loaf pan, though you will need to reduce the oven temperature to 165°C and bake for longer. Ensure the loaf pan is lined with parchment paper for easy removal.
Can I freeze this cake?
This cake freezes exceptionally well for up to three months if wrapped tightly in plastic wrap and aluminum foil. Thaw it slowly at room temperature before serving to maintain the texture.
Conclusion
Holiday Marble Cake remains a timeless favorite because it combines simple pantry staples with a stunning visual finish. By following these precise steps for mixing and baking, you ensure a reliable result that brings joy to any table. Whether you serve it with a warm drink or as a stand-alone dessert, its classic combination of vanilla and chocolate never fails to impress. Embrace the process, share with your family, and enjoy the rich, balanced flavor in every bite.
Holiday Marble Cake
Ingredients
Method
- Preheat oven to 175°C (350°F) and grease a 9-inch Bundt pan.
- Whisk flour, baking powder, and salt together in a medium bowl.
- Beat butter and sugar in a large bowl for 4-5 minutes until pale and fluffy.
- Incorporate eggs one at a time, beating well after each addition.
- Add half of the flour mixture, then the milk and vanilla, then the remaining flour, mixing until just combined.
- In a small bowl, whisk cocoa powder and hot water until smooth.
- Remove one-third of the vanilla batter and stir in the cocoa mixture.
- Spoon alternating dollops of vanilla and chocolate batter into the prepared pan.
- Swirl gently with a knife to create a marble effect.
- Bake for 50 minutes or until a skewer inserted into the center comes out clean.
- Cool in the pan for 10 minutes before inverting onto a wire rack to cool completely.