
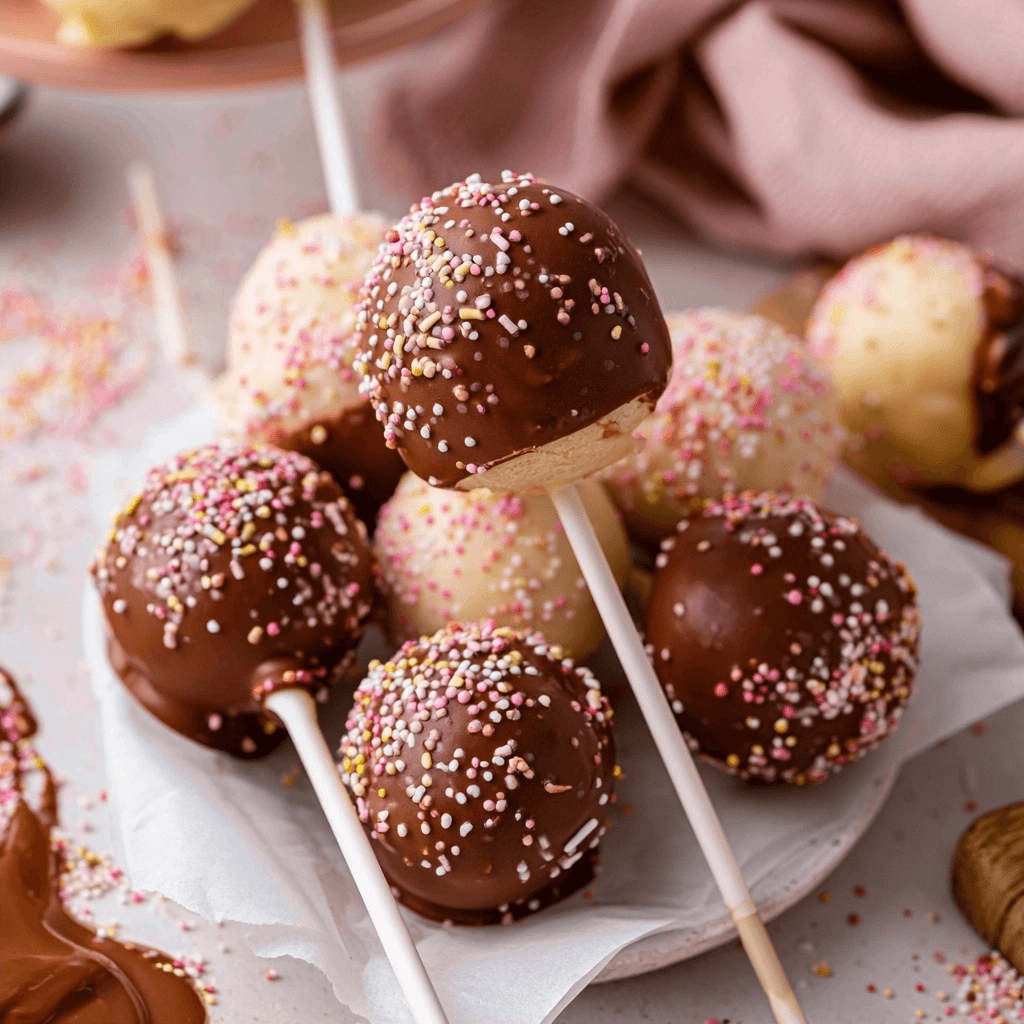
You can learn how to make cake pops that are perfectly moist, bite-sized, and beautifully decorated by following this reliable method. I discovered this technique in my own kitchen while perfecting my signature dessert line for Eminent Recipes, and it remains a family favorite. This recipe produces a soft, cakey center encased in a crisp chocolate shell, making it an ideal sweet treat for busy weeknights or special birthday parties. You will love how customizable these pops are for any festive occasion.
Recipe Overview
| Category | Details |
|---|---|
| Prep Time | 45 minutes |
| Cook Time | 35 minutes |
| Total Time | 3 hours 30 minutes |
| Servings | 20 pops |
| Difficulty | Intermediate |
| Cuisine | American |
Why This Recipe Works
This recipe works because it focuses on achieving the ideal ratio of cake to frosting, ensuring the balls hold their shape without becoming overly dense. I have refined these ratios through years of professional baking to guarantee a texture that melts in your mouth while remaining firm enough to stay on the stick.
You will appreciate the versatility of this base recipe, which allows you to experiment with different extracts or colored coatings to match any theme. It is a structured process that eliminates guesswork, providing clear indicators for when your cake is perfectly baked and when your coating is at the ideal dipping temperature.
Ingredients
| Ingredient | Quantity | Notes |
| All-purpose flour | 1 2/3 cups | Spoon and level accurately |
| Baking powder | 1/2 tsp | Ensures proper rise |
| Baking soda | 1/4 tsp | Balances the acidity |
| Unsalted butter | 1/2 cup | Room temperature is essential |
| Granulated sugar | 1 cup | Provides structure |
| Large egg | 1 | Room temperature |
| Vanilla extract | 2 tsp | Use high-quality pure extract |
| Whole milk | 1 cup | Or buttermilk for extra moisture |
| Confectioners sugar | 1 3/4 cups | Sift to remove clumps |
| Candy melts | 24 oz | White chocolate is a fine alternative |
Step-by-Step Instructions
Preparing the Cake Base
- Preheat your oven to 350°F and grease a 9-inch springform pan thoroughly.
- Whisk your flour, baking powder, baking soda, and salt in a medium bowl until combined.
- Cream the softened butter and sugar in a large bowl for 3 minutes until light and fluffy.
- Beat in the egg and vanilla extract, scraping the sides to ensure even mixing.
- Add the dry ingredients and milk alternately, mixing on low speed until the batter is smooth.
- Bake for 30 to 36 minutes until a toothpick inserted into the center comes out clean.
- Cool the cake completely in the pan before proceeding to the next phase.
Creating the Cake Mixture
- Beat the softened butter until creamy, then add the confectioners sugar, heavy cream, and vanilla.
- Crumble the completely cooled cake into a large mixing bowl, removing any large chunks.
- Mix the frosting into the cake crumbs until the mixture holds together like dough.
- Scoop 1 tablespoon portions and roll them into firm, smooth spheres using your palms.
- Chill the balls in the refrigerator for two hours or the freezer for one hour.
Coating and Assembly
- Melt your candy coating in a microwave-safe cup using 20-second intervals until perfectly smooth.
- Dip the tip of a lollipop stick into the coating and insert it halfway into a chilled ball.
- Submerge the entire cake ball into the coating, swirling gently to cover completely.
- Tap the stick against the edge of the container to remove excess coating before it sets.
- Add decorative sprinkles immediately and place the finished pop upright in a foam block.
Chef Tips for Perfect Results
- Keep your cake balls very cold; this prevents them from falling off the stick during the dipping process.
- Do not overfill your mixing bowl with frosting, as this creates a greasy, unmanageable dough texture.
- Use a deep, narrow container for melting your coating to make dipping easier and ensure full coverage.
- Work in small batches of 2-3 pops at a time to ensure the cake remains firm while you work.
Common Mistakes to Avoid
One major error is using hot cake for the dough, which causes the frosting to melt and creates a mushy, oily consistency. Always wait for the cake to reach room temperature before crumbling. Another mistake is omitting the chilling step, which is vital for maintaining the structural integrity of the pop while you handle it. If your coating is too thick, do not worry; simply thin it with a tiny amount of vegetable oil to improve the flow.
Variations and Substitutions
| Ingredient | Substitution | Impact |
| Whole milk | Buttermilk | Adds tang and extra tenderness |
| Candy melts | White chocolate | Provides a richer, creamier flavor |
| Vanilla extract | Almond extract | Changes profile to a nutty flavor |
Serving Suggestions and Pairings
These treats are perfect for elegant baby showers, weddings, or children’s birthday parties. Serve them standing upright in a decorative display box to showcase the colors of the coatings and sprinkles. They pair beautifully with cold glasses of milk or light fruit-infused sparkling water.
Storage and Reheating
| Method | Duration | Instructions |
| Refrigerator | Up to 1 week | Store in an airtight container |
| Freezer | Up to 3 months | Wrap individually in plastic wrap |
Nutritional Information
Approximate values per serving:
| Nutrient | Amount per serving |
| Calories | 180 kcal |
| Fat | 8g |
| Carbohydrates | 25g |
| Protein | 2g |
Frequently Asked Questions
Can I use a boxed cake mix instead of homemade?
You can substitute a boxed cake mix if you are short on time, though homemade cake provides a superior structural foundation. Ensure you reduce the liquid slightly to compensate for the difference in moisture content.
Why do my cake pops crack after dipping?
Cracking usually happens when there is a significant temperature difference between the cold cake ball and the hot coating. Let your coating cool slightly after melting before you begin the dipping process.
How do I stop the cake balls from falling off the stick?
The cake balls fall off if they are not chilled long enough or if the dipping coating is too heavy. Ensure the balls are cold and keep the coating thin enough to prevent pulling the cake apart.
Can I make these treats a day in advance?
You can definitely prepare these a day in advance, as they keep well in the refrigerator for up to one week. Keeping them chilled preserves their texture and ensures the coating remains crisp for your event.
What is the best way to keep them standing upright?
A simple piece of floral foam or a cardboard box with small holes drilled into it works perfectly as a stand. This allows the coating to set perfectly without touching the table surface.
Creating these delightful treats at home is a rewarding process that bridges the gap between basic baking and artistic expression. With this guide, you now have the tools to create professional-grade sweets that your friends and family will adore. Remember to maintain the chill on your cake balls for the best results and enjoy the process of decorating. Your journey into mastering the art of the perfect cake pop begins here, and I look forward to seeing your beautiful creations.