
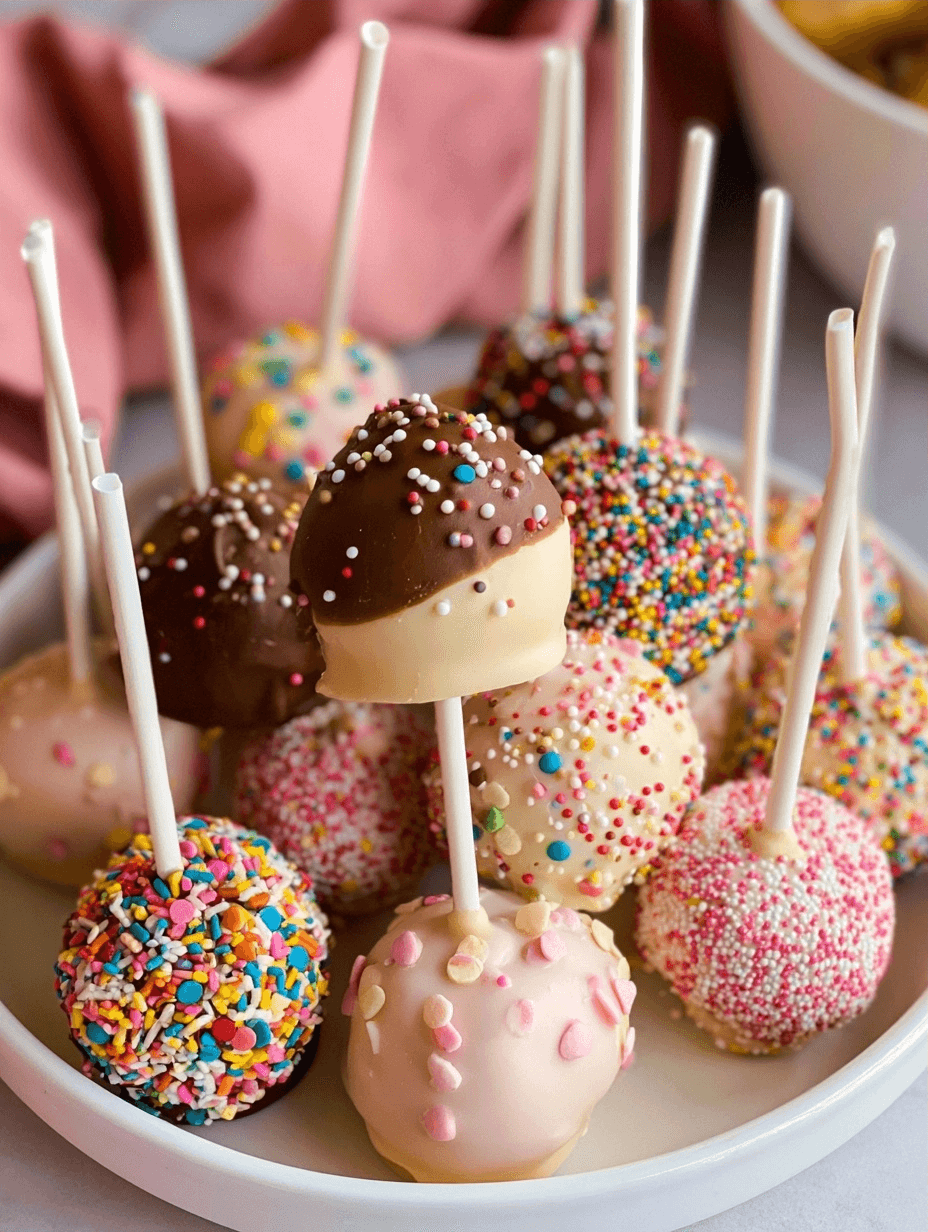
You can learn how to make cake pops that are perfectly moist, bite-sized, and beautifully decorated by following this reliable method. I developed this process at Eminent Recipes to ensure home bakers achieve professional results every single time. This recipe is quick, easy, and family-friendly, offering a versatile base that allows for endless creative customization. Whether you need a festive dessert for a birthday party or a simple treat for a busy weeknight, these cake pops deliver pure satisfaction.
Recipe Overview
| Prep Time | Cook Time | Total Time | Servings | Difficulty | Cuisine |
|---|---|---|---|---|---|
| 45 mins | 35 mins | 4 hours | 24 pops | Moderate | American |
Why This Recipe Works
This recipe works because it relies on the perfect ratio of structural cake density to creamy frosting, ensuring the balls hold their shape without crumbling. I have spent countless hours in my kitchen testing various flour-to-sugar balances to find the ideal texture that melts in your mouth.
You will love how simple these are to assemble once you master the chilling technique. By using standard pantry staples like flour, butter, and vanilla, this method eliminates the need for expensive store-bought mixes or complex baking supplies.
Ingredients
| Ingredient | Quantity | Notes |
|---|---|---|
| All-purpose flour | 1 2/3 cups | Spoon and level carefully |
| Unsalted butter | 1/2 cup + 7 Tbsp | Room temperature is vital |
| Granulated sugar | 1 cup | Standard white sugar works best |
| Egg | 1 large | Room temperature |
| Whole milk | 1 cup | Buttermilk as a substitute |
| Confectioners sugar | 1 3/4 cups | Sift to remove lumps |
| Candy melts | 24 oz | Use high-quality melting wafers |
Step-by-Step Instructions
Baking the Cake
- Preheat your oven to 350°F (177°C) and grease a 9-inch springform pan thoroughly.
- Whisk flour, baking powder, baking soda, and salt in a medium bowl until fully combined.
- Beat the butter and sugar in a large bowl for 3 minutes until light and fluffy.
- Add the egg and vanilla, beating on high until the mixture is completely smooth.
- Mix in the dry ingredients and milk on low speed until no large lumps remain.
- Pour batter into the pan and bake for 30 to 36 minutes until a toothpick comes out clean.
- Cool the cake completely on a wire rack before attempting to crumble it.
Preparing the Pops
- Beat the softened butter until creamy, then add confectioners sugar, cream, and vanilla.
- Crumble the cooled cake into the frosting bowl, ensuring the pieces are very fine.
- Beat the mixture on low speed until it forms a uniform, pliable dough.
- Scoop 1 tablespoon portions, roll them into smooth balls, and chill them for at least 2 hours.
Coating and Finishing
- Melt your candy wafers in a heat-proof container using 20-second microwave increments.
- Dip the tip of a lollipop stick into the melted candy, then insert it into a cold cake ball.
- Submerge the ball fully into the candy, tapping off excess coating gently.
- Place the pops upright in a foam block to set for one hour before serving.
Chef Tips for Perfect Results
- Always ensure your cake is completely cool before crumbling; warm cake will melt the frosting and create greasy dough.
- Use a small ice cream scoop to ensure every cake pop is exactly the same size.
- Keep the cake balls inside the refrigerator until the very last second before dipping to prevent them from falling off the sticks.
- Avoid overheating your candy melts, as this causes the coating to seize and become grainy.
Common Mistakes to Avoid
- Adding too much frosting makes the balls too heavy and causes them to slide off the stick.
- Dipping warm cake balls results in the coating cracking as the cake expands during cooling.
- Skipping the chill time in the freezer leads to structural collapse when you dip them.
- Using water-based food coloring instead of oil-based candy colors will ruin your melting wafers.
Variations and Substitutions
| Ingredient | Substitution | Impact |
|---|---|---|
| Vanilla extract | Almond extract | Adds a nutty floral depth |
| Whole milk | Buttermilk | Provides a tangier flavor profile |
| Candy melts | White chocolate | Requires more care to melt smooth |
Storage and Reheating
| Method | Duration | Instructions |
|---|---|---|
| Refrigerator | 1 Week | Keep in an airtight container |
| Freezer | 3 Months | Wrap individually in plastic wrap |
Frequently Asked Questions
Can I use a different flavor cake?
You can use any dense cake variety for these pops. Simply ensure the crumb is fine and the frosting matches the flavor profile of the base cake.
How do I keep them from falling off the stick?
You prevent the pops from falling by chilling the dough thoroughly before dipping. The cold temperature keeps the cake firm enough to hold the weight of the coating.
Can these be made ahead of time?
You can prepare the cake and frosting days in advance to streamline the process. The finished pops store beautifully in the refrigerator for up to one week.
How can I tell when they are done baking?
The cake is finished when a toothpick inserted into the center comes out clean. Do not overbake the cake, as this makes the crumbles dry and difficult to mix.
What is the best way to decorate them?
Apply sprinkles immediately after dipping while the coating is still tacky. This ensures the decorations adhere perfectly to the surface before the candy sets.
Learning how to make cake pops is a rewarding experience that brings joy to any occasion. By mastering the delicate balance of cake and frosting, you create a treat that is as professional as it is delicious. Feel free to experiment with different extracts or colorful decorations to match your personal style. Grab your apron and start creating these delightful, bite-sized sweets today. The combination of moist cake and smooth, crunchy candy shell is sure to become a favorite in your household.
Print
Professional Style Cake Pops
- Total Time: 240
- Yield: 24 pops 1x
- Diet: Vegetarian
Description
Learn to create perfectly moist, bite-sized cake pops with this reliable, professional-grade recipe. Developed to ensure a consistent texture, these pops combine a dense, flavorful cake base with a smooth, creamy frosting, making them an ideal treat for birthdays or any special gathering. This step-by-step guide walks you through the baking, shaping, and dipping process to ensure your creations are both beautiful and delicious every single time.
Ingredients
1 2/3 cups all-purpose flour
1/2 cup plus 7 Tbsp unsalted butter, softened
1 cup granulated sugar
1 large egg
1 cup whole milk
1 tsp vanilla extract
1 3/4 cups confectioners sugar
24 oz candy melts
Instructions
Preheat oven to 350°F (177°C) and grease a 9-inch springform pan.
Whisk flour, baking powder, baking soda, and salt in a bowl.
Beat 1/2 cup butter and sugar for 3 minutes until light and fluffy.
Add egg and vanilla, beating until smooth.
Mix in dry ingredients and milk on low speed until combined.
Pour batter into the pan and bake for 30-36 minutes until a toothpick comes out clean.
Cool the cake completely on a wire rack.
Crumble the cooled cake into fine crumbs in a large bowl.
Beat remaining butter, confectioners sugar, and a splash of milk to create a creamy frosting.
Mix frosting into cake crumbs until a dough-like consistency forms.
Roll the mixture into 24 uniform balls and chill in the refrigerator for 2 hours.
Melt candy wafers according to package instructions.
Dip a cake pop stick into the melted candy and insert into a chilled ball.
Dip the entire cake pop into the candy coating, allowing excess to drip off, then set on parchment to dry.
Notes
Ensure the cake is completely cooled before crumbling to prevent a gummy texture. Room temperature ingredients are crucial for the best cake structure. Use high-quality melting wafers for a smooth, professional finish.
- Prep Time: 45
- Cook Time: 35
- Category: Baking
- Method: Baking
- Cuisine: American
Nutrition
- Serving Size: 1 pop
- Calories: 210
- Sugar: 22g
- Sodium: 85mg
- Fat: 11g
- Saturated Fat: 6g
- Carbohydrates: 28g
- Fiber: 0.5g
- Protein: 2g
- Cholesterol: 30mg